Avocado Toast with Boiled Egg: A Pregnancy Snack for All-Day Energy
Introduction
Few snacks manage to be as simple, as widely loved, and as genuinely useful as avocado toast topped with a boiled egg. It’s the kind of recipe that shows up on brunch menus for its flavor, but during pregnancy it earns its place on the table for a very different reason: it’s one of the most effective combinations you can put together to fight the kind of fatigue that seems to creep in no matter how much sleep you managed the night before. Between the healthy fat in the avocado, the fiber in whole grain bread, and the protein and choline in the egg, this snack checks nearly every box nutritionists point to when they talk about sustained, steady energy rather than a quick spike and crash.
What makes this snack especially practical is how little it actually asks of you. There’s no simmering, no waiting for something to reduce or thicken, and no ingredient that requires a special trip to the store. On a day when fatigue makes even small tasks feel larger than they are, being able to put together something this nourishing in under five minutes matters more than it might seem to on paper. It also happens to be endlessly adaptable — dressed up with a poached egg and chili flakes for a slower morning, or kept plain and simple when nausea makes bold flavors unwelcome.
Ingredients
- 1 slice whole grain or whole wheat bread
- ½ ripe avocado
- 1 large egg
- A pinch of salt and pepper
- Optional: a pinch of red pepper flakes, a squeeze of lemon juice, microgreens or fresh herbs, sesame seeds
A quick note on ingredients: choosing whole grain bread over white bread makes a meaningful difference here, since the extra fiber slows down how quickly the toast’s carbohydrates are digested, which helps the snack’s energy last longer. The avocado should be ripe enough to mash easily with a fork but not so soft that it’s turned brown or stringy — a gentle squeeze should give slightly without feeling mushy. Any style of cooked egg works, though a soft or hard-boiled egg is the most convenient option if you’re batch-cooking a few at the start of the week to have on hand.
How to Make
- Bring a small pot of water to a boil. Gently lower the egg in and cook for 6–7 minutes for a soft-boiled egg with a slightly jammy center, or 10–12 minutes for a fully hard-boiled egg.
- While the egg cooks, toast the bread until golden and firm enough to hold toppings without going soggy.
- Transfer the boiled egg to a bowl of ice water for a minute or two to stop the cooking and make it easier to peel.
- Scoop the avocado flesh into a small bowl and mash it with a fork, leaving it as smooth or chunky as you prefer. Season with a pinch of salt and pepper, and a squeeze of lemon juice if using.
- Spread the mashed avocado evenly over the toasted bread.
- Peel the egg and slice it in half or into rounds, then arrange it on top of the avocado.
- Finish with a sprinkle of salt, pepper, red pepper flakes, microgreens, or sesame seeds, depending on what you have on hand and what sounds appealing.
Why Is This a Pregnancy-Friendly, Fatigue-Fighting Snack?
The combination of healthy fat, fiber, and protein in this snack is exactly what tends to be missing from snacks that leave people crashing an hour later. Avocado is rich in monounsaturated fat and fiber, both of which slow digestion considerably, meaning the energy from this snack is released gradually instead of all at once. Whole grain bread adds further fiber on top of that, which helps prevent the kind of quick rise-and-fall in blood sugar that white bread or a pastry might cause.
The egg contributes a meaningful dose of complete protein, which also slows digestion and helps you feel satisfied for longer. Beyond that, eggs are one of the best dietary sources of choline, a nutrient that plays a significant role in fetal brain and spinal cord development and that many prenatal diets fall short on, since it isn’t included in every prenatal vitamin. Together, the fat, fiber, and protein in this single snack work as a kind of built-in pacing system for energy, which is part of why it shows up so consistently as a go-to recommendation for fighting pregnancy fatigue rather than just a trendy brunch item.
Nutrition (per serving)
- Calories: ~280
- Carbohydrate: ~22g
- Fiber: ~7g
- Protein: ~12g
- Fat: ~17g (mostly monounsaturated)
How to Store
This snack is best made fresh and eaten right away, since avocado tends to brown fairly quickly once mashed and exposed to air, and toast loses its crisp texture as it sits. That said, you can prepare the components ahead of time to make assembly faster later in the week: boiled eggs, whether soft or hard-boiled, keep well in their shells in the refrigerator for up to a week, making them one of the easiest make-ahead proteins to have on hand. If you want to prep avocado slightly in advance, squeeze a bit of lemon or lime juice over the mashed or sliced avocado and press plastic wrap directly against its surface before refrigerating; this slows browning for a few hours, though it’s still best used within a day. Bread, of course, keeps at room temperature or in the freezer according to its own packaging, ready to toast whenever the snack craving hits. Having eggs boiled and bread on hand means this entire snack can go from fridge to plate in the time it takes to mash half an avocado — which, on a tired day, is exactly the point.
Hummus & Veggie Sticks: A Pregnancy Snack for All-Day Energy
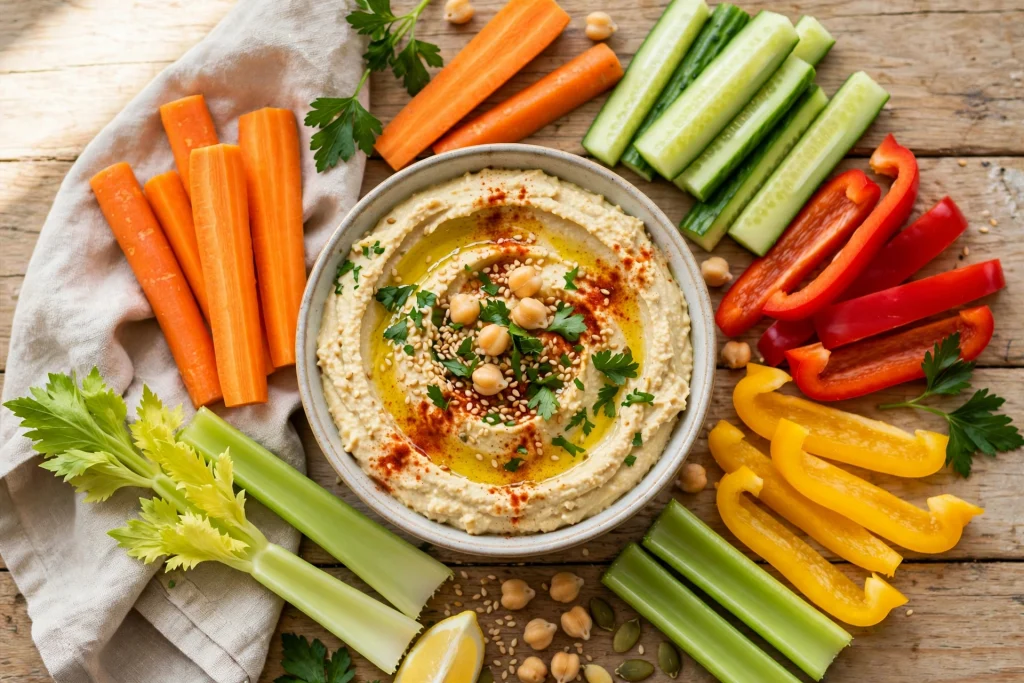
There’s a reason hummus and veggie sticks has remained a go-to snack for decades — it manages to feel indulgent and virtuous at the same time, with a satisfying dip and a crunchy vehicle for scooping it up. During pregnancy, this combination earns an even stronger case for a regular spot in the snack rotation, not just because it’s easy to prepare, but because it’s genuinely well-suited to fighting the kind of fatigue that tends to show up regardless of how much rest you’re getting. Chickpeas, the base of hummus, bring plant-based protein, fiber, and a notable amount of iron and folate — nutrients that matter enormously during pregnancy and whose shortage can itself contribute to feeling tired.
What makes this snack especially appealing on a low-energy day is how little effort it demands relative to how substantial it feels. There’s no cooking involved if you’re using store-bought hummus, and even homemade hummus takes only a few minutes in a food processor. Raw vegetables need nothing more than washing and cutting into sticks, and the whole thing can be prepped in batches at the start of the week so that a satisfying snack is always just an arm’s reach away in the fridge. It’s also naturally portable, making it one of the easier snacks to pack for work, appointments, or anywhere else the day takes you.
Ingredients
- ½ cup hummus (store-bought or homemade)
- 1 medium carrot, cut into sticks
- 1 small cucumber, cut into sticks
- ½ red bell pepper, cut into strips
- 2–3 celery stalks, cut into sticks
- Optional: a drizzle of olive oil and a pinch of paprika for serving, a squeeze of lemon
For homemade hummus (makes about 1½ cups):
- 1 can (15 oz) chickpeas, drained and rinsed
- 2 tbsp tahini
- 2 tbsp olive oil
- 2 tbsp lemon juice
- 1 garlic clove
- 2–3 tbsp water, as needed
- ½ tsp salt
A quick note on ingredients: if you’re making hummus from scratch, removing the thin skins from the chickpeas (by rubbing them gently in a towel after rinsing) gives a noticeably smoother texture, though it’s an optional step if you’re short on time. Any combination of vegetables works here — bell peppers, cucumber, carrots, and celery are common choices because they hold their shape well as sticks and offer a nice mix of crunch and hydration, but snap peas, cherry tomatoes, or radishes work just as well if that’s what you have on hand.
How to Make
- If making homemade hummus, combine the chickpeas, tahini, olive oil, lemon juice, garlic, and salt in a food processor.
- Blend until smooth, stopping to scrape down the sides as needed and adding water a tablespoon at a time until the hummus reaches a creamy, scoopable consistency.
- Taste and adjust the seasoning, adding more lemon juice or salt if needed.
- Wash the carrot, cucumber, bell pepper, and celery, then cut them into evenly sized sticks or strips for easy dipping.
- Spoon the hummus into a serving bowl, and if desired, drizzle with a little olive oil and a sprinkle of paprika for extra flavor.
- Arrange the vegetable sticks around the bowl and serve immediately, or pack both into separate containers for an on-the-go snack.
Why Is This a Pregnancy-Friendly, Fatigue-Fighting Snack?
Chickpeas are the real workhorse in this snack. They’re a solid source of plant-based protein and fiber, both of which slow digestion considerably and help prevent the kind of fast blood sugar rise and fall that can leave you feeling tired again shortly after eating. Beyond that, chickpeas contain a meaningful amount of iron and folate — two nutrients that are in especially high demand during pregnancy, since the body is working to support increased blood volume and fetal development. Iron deficiency in particular is a well-known contributor to fatigue, so working iron-containing foods into regular snacks is a genuinely practical strategy, not just a nutritional checkbox.
The raw vegetables add their own value beyond crunch and flavor. They contribute additional fiber and hydration with very little caloric or carbohydrate cost, which means this snack delivers a lot of volume and staying power without leaning on refined carbohydrates the way many packaged snacks do. The olive oil and tahini in the hummus also bring healthy fats to the mix, further slowing digestion and helping the energy from this snack last rather than spiking briefly. Altogether, it’s a combination that addresses fatigue from more than one angle at once — steady energy release, plus specific nutrients that pregnancy itself tends to draw down.
Nutrition (per serving, ½ cup hummus with vegetables)
- Calories: ~220
- Carbohydrate: ~24g
- Fiber: ~7g
- Protein: ~7g
- Fat: ~11g
How to Store
Hummus keeps well, which makes this an excellent snack to prep in advance. Store homemade or opened store-bought hummus in an airtight container in the refrigerator for up to a week, giving it a quick stir before serving if any oil has separated on top. Raw vegetable sticks also hold up well when prepped ahead: store them in an airtight container lined with a paper towel to absorb excess moisture, and they’ll stay crisp in the refrigerator for 4–5 days, with carrots and celery generally lasting the longest and cucumber being best used within the first couple of days for the crispest texture. For the most convenient grab-and-go setup, portion the hummus into small individual containers alongside a bag of pre-cut vegetables, so the whole snack is ready to eat straight from the fridge whenever hunger or fatigue hits. This snack is not suitable for freezing, since both the hummus’s texture and the vegetables’ crunch suffer significantly once thawed.
-e
Apple & Almond Butter Slices: A Pregnancy Snack for All-Day Energy
Introduction
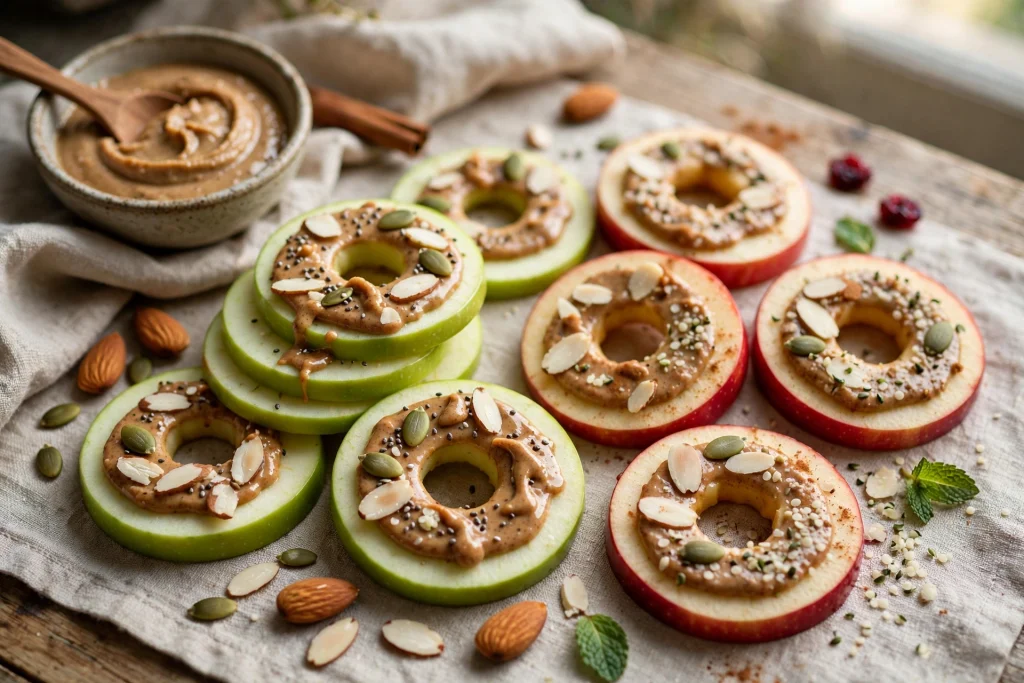
There’s a reason apple slices with almond butter has become such a staple snack recommendation — it pairs a naturally sweet, crisp fruit with a rich, protein-and-fat-packed spread, creating a combination that’s both satisfying and genuinely energizing. During pregnancy, when fatigue can show up at almost any hour of the day, this snack earns its place for a simple reason: it delivers natural sugar for a quick lift, balanced by protein and healthy fat that keep that lift from turning into a crash twenty minutes later. It also happens to require zero cooking and almost no cleanup, which matters enormously on a day when standing at the counter for longer than necessary feels like too much to ask.
What makes this snack particularly worth keeping in regular rotation is its portability and consistency. Unlike snacks that need refrigeration or careful storage, an apple and a jar of almond butter can go anywhere — a bag, a car, a desk drawer — and still taste just as good hours later. It’s also a snack that scales effortlessly, whether you need a small bite to tide you over or a more substantial pre-appointment snack that will actually hold you until your next real meal.
Ingredients
- 1 medium apple (any variety — Honeycrisp, Gala, and Fuji all work well)
- 2 tbsp natural almond butter (no added sugar)
- Optional: a sprinkle of cinnamon, a few sliced almonds or chopped walnuts on top, a light drizzle of honey
A quick note on ingredients: choosing a natural almond butter, meaning one made from just almonds (and maybe a pinch of salt), rather than a sweetened commercial spread, makes a real difference here. Many jarred nut butters on grocery shelves include added sugar and hydrogenated oils, which quietly undercuts the point of pairing fruit with a protein-rich spread in the first place. If almond butter isn’t available, peanut butter or cashew butter work as reasonable substitutes with a similar nutritional profile. Any apple variety works, though a slightly tart apple like Granny Smith provides a nice contrast to the richness of the almond butter, while a sweeter variety like Honeycrisp leans further into the natural-dessert feel of the snack.
How to Make
- Wash the apple thoroughly and pat it dry.
- Slice the apple into wedges, cutting around the core rather than through it, or use an apple slicer for evenly sized pieces.
- If you’d like to slow browning slightly, toss the slices very lightly with a small squeeze of lemon juice, though this step is optional and mostly cosmetic.
- Arrange the apple slices on a plate.
- Spoon the almond butter into a small bowl alongside the apple slices for dipping, or spread a thin layer directly onto each slice if you prefer them pre-assembled.
- If desired, sprinkle the almond butter with a pinch of cinnamon, a few sliced almonds or chopped walnuts, or a light drizzle of honey for extra flavor and crunch.
- Serve immediately for the best texture and flavor.
Why Is This a Pregnancy-Friendly, Fatigue-Fighting Snack?
Apples are a good source of fiber, particularly in their skin, which slows down how quickly their natural sugar is absorbed into the bloodstream compared to something like apple juice or dried apple, where that fiber has largely been removed or concentrated away. This means the natural sweetness of the apple provides a genuine, if modest, energy boost without the sharp spike-and-crash pattern that a more refined sugary snack might cause on its own.
Almond butter is really doing the heavy lifting in terms of sustained energy, though. It’s rich in protein, healthy monounsaturated fat, and fiber, all of which significantly slow digestion when paired with the apple’s natural sugars. This combination — a moderately fast-digesting carbohydrate paired with a slow-digesting fat and protein source — is a commonly recommended pattern specifically because it tends to produce a more level, longer-lasting energy response than either food eaten alone. Almonds also contain magnesium and vitamin E, both of which play supporting roles in energy metabolism and overall cellular health, which is a modest but real bonus during a period when nutrient needs are elevated across the board.
Nutrition (per serving)
- Calories: ~270
- Carbohydrate: ~28g
- Fiber: ~7g
- Protein: ~7g
- Fat: ~16g (mostly monounsaturated)
How to Store
This snack is best assembled just before eating, mostly because apple slices begin to brown within 20–30 minutes of being cut, even with a light coating of lemon juice slowing the process. That said, the two components store beautifully on their own, which makes this one of the easiest snacks to keep ready at a moment’s notice. Whole, unsliced apples keep at room temperature for about a week or in the refrigerator for several weeks, so there’s no need to pre-cut them in advance. Natural almond butter keeps well in a sealed jar in the pantry for a few months unopened, and in the refrigerator for a couple of months once opened, though it’s worth giving it a good stir if any oil has separated on top, which is normal for natural nut butters without stabilizers. If you do want a slightly more prepped version for busy mornings, pre-portioning almond butter into small containers means all that’s left to do later is slice an apple, cutting the active prep time down to under a minute.
Greek Yogurt with Honey & Walnuts: A Pregnancy Snack for All-Day Energy
Introduction
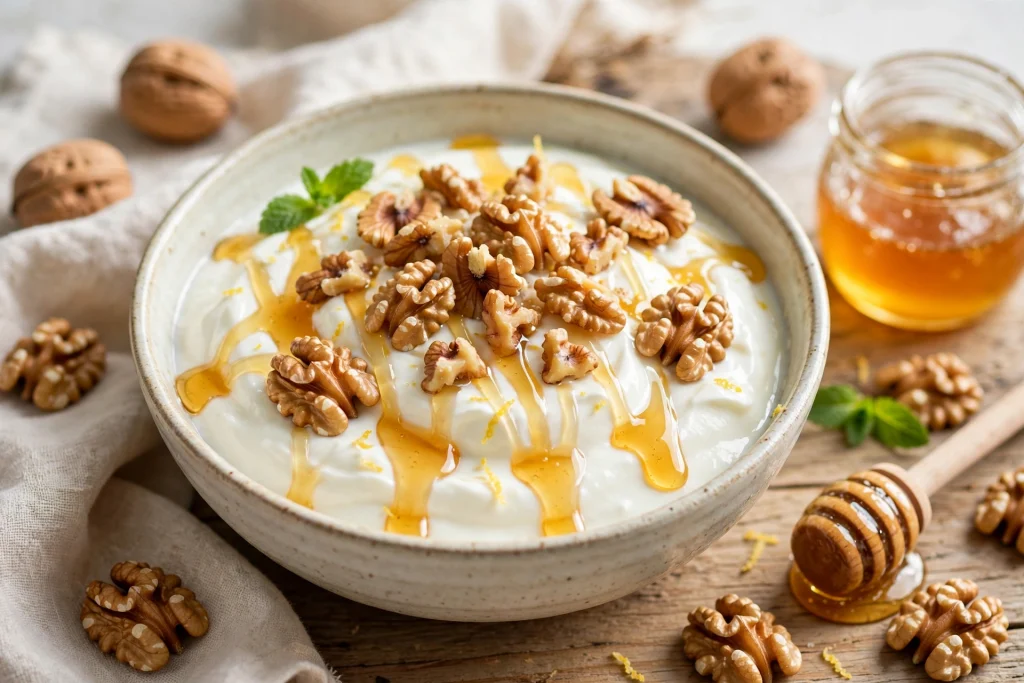
Greek yogurt topped with a drizzle of honey and a scattering of walnuts is one of those snacks that manages to feel like a genuine treat while quietly doing a great deal of nutritional work behind the scenes. During pregnancy, when energy levels can fluctuate unpredictably throughout the day, this combination stands out for a specific reason: Greek yogurt is considerably higher in protein than regular yogurt, and that extra protein plays a real role in how steadily the snack’s energy is released, rather than delivering a quick sugary lift that fades fast.
Part of what makes this snack so reliable is how little variability there is in its preparation — there’s no cooking, no waiting, and no risk of getting it wrong. Open the yogurt, add the toppings, and it’s ready. That consistency matters on days when fatigue makes even minor decisions feel like more effort than they’re worth. It also happens to double easily as a light dessert after dinner, which means it can serve two purposes without needing to plan two separate things.
Ingredients
- 1 cup plain Greek yogurt (full-fat or 2%)
- 1–2 tsp honey
- 2 tbsp walnuts, roughly chopped
- Optional: a pinch of cinnamon, a few fresh berries on top
A quick note on ingredients: plain Greek yogurt is the key choice here rather than a flavored variety, since flavored yogurts — even ones marketed as healthy — often contain nearly as much added sugar as a dessert. Full-fat or 2% yogurt is generally preferable to fat-free here, since the extra fat contributes to satiety and helps slow digestion, which supports the goal of steady, lasting energy rather than a quick spike. Walnuts are a good default choice for their omega-3 content, but almonds or pecans work just as well if that’s what’s on hand.
How to Make
- Spoon the Greek yogurt into a bowl.
- Drizzle the honey evenly over the top.
- Scatter the chopped walnuts over the yogurt.
- If using, add a light dusting of cinnamon and a few fresh berries for extra flavor and color.
- Serve immediately, stirring the toppings in or leaving them on top depending on preference.
Why Is This a Pregnancy-Friendly, Fatigue-Fighting Snack?
The protein content of Greek yogurt is the central reason this snack works as well as it does for sustained energy. Because Greek yogurt is strained to remove much of its liquid whey, it ends up with roughly double the protein of regular yogurt in the same serving size. That protein slows the absorption of the honey’s natural sugars, meaning the sweetness registers as a gentle lift rather than a rapid spike followed by an equally rapid drop.
Walnuts add a meaningful dose of healthy fat, including omega-3 fatty acids, which further slows digestion and contributes to feeling satisfied for longer after eating. Greek yogurt is also a good source of calcium, which supports bone health for both parent and growing baby, and it contains B vitamins that play a direct role in how the body converts food into usable energy. Taken together, this snack isn’t just “yogurt with toppings” — it’s a deliberately balanced combination where each ingredient is contributing something specific toward the goal of steadier, more sustained energy throughout the day.
Nutrition (per serving)
- Calories: ~240
- Carbohydrate: ~18g
- Fiber: ~1g
- Protein: ~18g
- Fat: ~11g
How to Store
This snack is meant to be assembled fresh, since walnuts lose their crunch and honey can pool unevenly if left to sit in the yogurt for too long. The individual components, however, store very well on their own. Keep plain Greek yogurt in its original container in the refrigerator according to its use-by date — it typically keeps for one to two weeks once opened, as long as it’s handled with a clean spoon each time. Honey doesn’t require refrigeration at all and can be kept at room temperature indefinitely, since its low water content naturally resists spoilage. Walnuts are best stored in an airtight container; keeping them in the refrigerator or freezer rather than the pantry helps prevent their natural oils from turning rancid, especially if you don’t go through them quickly. For the fastest possible assembly on a tired day, keep a small container of pre-chopped walnuts on hand in the fridge, so all that’s left to do is scoop the yogurt and drizzle the honey.
Oatmeal with Mixed Berries: A Pregnancy Snack for All-Day Energy
Introduction
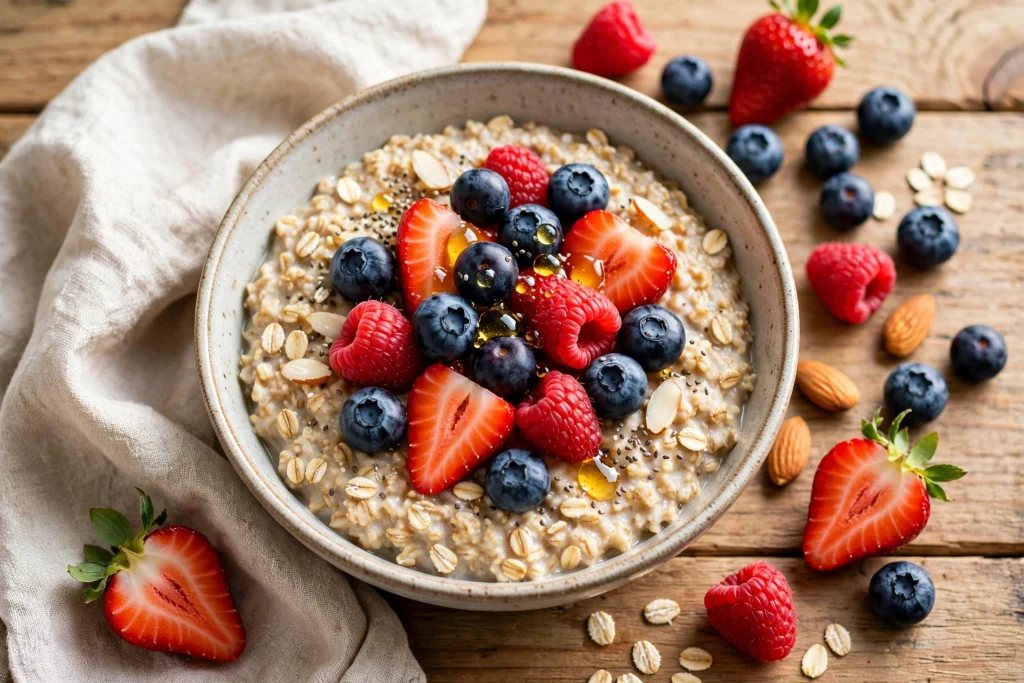
A warm bowl of oatmeal topped with a handful of fresh berries is the kind of snack that feels almost too simple to be as effective as it actually is. Oats are a whole grain built around slow-digesting complex carbohydrates and a specific type of soluble fiber called beta-glucan, which has been studied repeatedly for its role in supporting steadier blood sugar and more even energy levels after eating. Pair that with berries — some of the lowest-sugar, highest-fiber fruits available — and you end up with a snack that provides genuine, lasting fuel rather than a quick, fleeting boost.
This combination also happens to be one of the more comforting options on a list of fatigue-fighting snacks, which matters more than it might seem. A warm bowl of oatmeal can feel almost restorative in a way that a cold snack sometimes doesn’t, particularly on a day when everything already feels like more effort than usual. It’s flexible enough to eat any time of day, not just at breakfast, and it comes together with minimal ingredients and almost no cleanup beyond a single pot or bowl.
Ingredients
- ½ cup old-fashioned rolled oats
- 1 cup water or milk of choice (dairy or plant-based)
- Pinch of salt
- ½ cup mixed fresh berries (blueberries, raspberries, strawberries, or a combination)
- Optional: a drizzle of honey, a sprinkle of cinnamon, a spoonful of nut butter or a scatter of chopped nuts
A quick note on ingredients: old-fashioned rolled oats are recommended over instant oats here, since instant oats are more processed and tend to digest faster, somewhat undercutting the slow, steady energy release that makes oatmeal such a useful snack in the first place. Cooking the oats in milk rather than water adds extra protein and creaminess, which can make the snack more satisfying and further help slow digestion, though water works perfectly well if that’s what’s on hand. Fresh berries are preferable to frozen when possible, since frozen berries release extra liquid into the oatmeal as they thaw, though frozen berries that have been briefly warmed separately work fine as a topping in a pinch.
How to Make
- In a small saucepan, combine the oats, water or milk, and a pinch of salt.
- Bring to a gentle boil over medium heat, then reduce the heat to low.
- Simmer, stirring occasionally, for about 5 minutes, until the oats have absorbed most of the liquid and reached a creamy consistency.
- Remove from the heat and let the oatmeal sit for a minute or two to thicken slightly further.
- Spoon the oatmeal into a bowl.
- Top with the mixed berries, arranging them however you like.
- If desired, finish with a drizzle of honey, a sprinkle of cinnamon, or a spoonful of nut butter for extra richness and staying power.
Why Is This a Pregnancy-Friendly, Fatigue-Fighting Snack?
The beta-glucan fiber in oats is the primary reason this snack performs so well for sustained energy. This particular type of soluble fiber forms a gel-like substance in the digestive tract, which slows down how quickly the oats’ carbohydrates are broken down and absorbed. The practical result is a much more gradual rise in blood sugar compared to a lower-fiber breakfast option like white toast or a sugary cereal, which translates into energy that lasts noticeably longer before fading.
Berries complement this well because they’re naturally low in sugar relative to most other fruits, while still being high in fiber and antioxidants. Raspberries and blackberries in particular have an especially favorable fiber-to-sugar ratio, though blueberries and strawberries are excellent choices as well. Adding berries instead of a spoonful of sugar or a flavored syrup keeps the sweetness tied to real fiber rather than working against the slow-digestion benefit the oats are providing. If milk is used instead of water, the added protein further slows digestion and adds a bit of calcium as well, rounding out a snack that manages to be both comforting and genuinely functional for keeping energy levels steady.
Nutrition (per serving)
- Calories: ~230
- Carbohydrate: ~40g
- Fiber: ~7g
- Protein: ~7g
- Fat: ~4g
How to Store
Oatmeal is best enjoyed warm right after cooking, but it also reheats well, which makes it a practical make-ahead option for busier days. Cooked oatmeal (without the berries) can be stored in an airtight container in the refrigerator for up to 5 days; reheat individual portions on the stovetop or in the microwave with a small splash of water or milk to loosen it back to a creamy consistency. Fresh berries are best added just before eating rather than stored mixed into the oatmeal, since they can turn mushy and release excess liquid if left sitting for an extended period. If you like to meal-prep, consider making a larger batch of plain oatmeal at the start of the week, portioning it into individual containers, and simply adding fresh berries and any other toppings right before eating each portion — this keeps the base ready to go while preserving the fresh texture of the fruit.
-e
Cottage Cheese with Pineapple: A Pregnancy Snack for All-Day Energy
Introduction
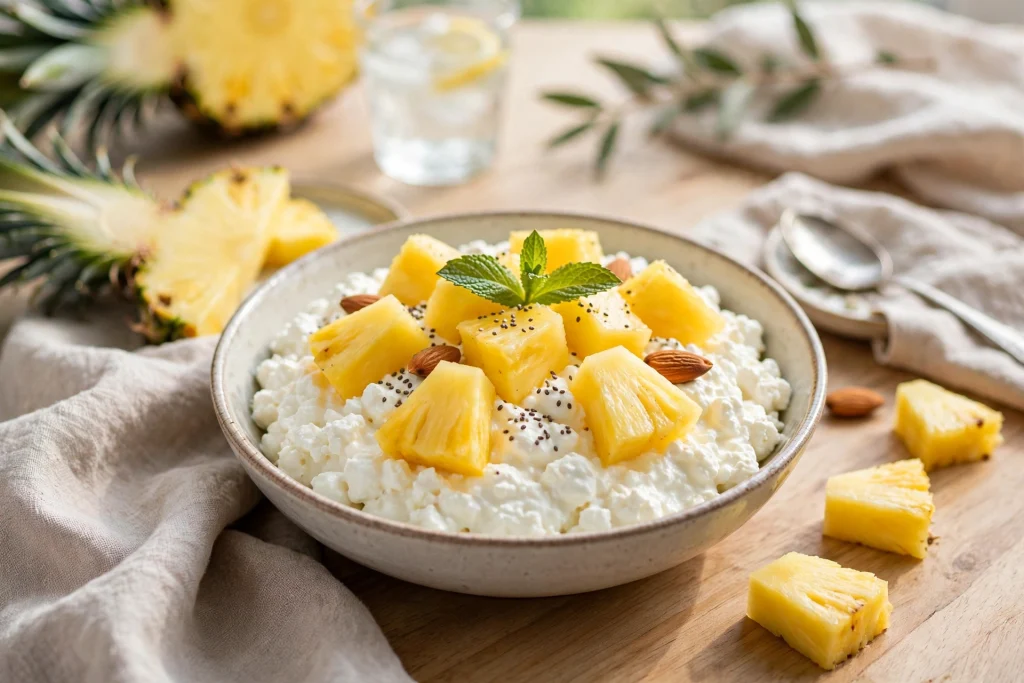
Cottage cheese with pineapple is one of those combinations that used to be a staple on diet plates decades ago, and it’s earning renewed attention now for good reason — it’s genuinely well-suited to supporting steady energy, particularly during pregnancy. Cottage cheese is one of the higher-protein dairy options available, and pairing its mild, creamy texture with fresh pineapple’s bright sweetness creates a snack that feels refreshing without sacrificing the staying power that comes from a solid protein base.
This snack tends to be especially appealing on days when appetite is unpredictable or when nausea makes heavier, richer foods less appealing. The coolness and lightness of cold cottage cheese and juicy pineapple can feel much more manageable than something warm or dense, while still delivering real nutritional substance rather than empty calories. It also requires essentially no preparation, which matters when energy for cooking is in short supply.
Ingredients
- 1 cup cottage cheese (full-fat, low-fat, or 2%, according to preference)
- ½ cup fresh pineapple, cut into small chunks
- Optional: a sprinkle of fresh mint, a pinch of cinnamon, a scatter of chopped nuts
A quick note on ingredients: fresh pineapple is preferable to canned pineapple packed in syrup, since canned varieties in syrup add a meaningful amount of extra sugar that isn’t necessary given how naturally sweet fresh pineapple already is. If fresh pineapple isn’t available, look for canned pineapple packed in its own juice rather than syrup, and drain it well before using. Any style of cottage cheese works here, though small-curd varieties tend to blend more pleasantly with the pineapple’s texture than large-curd versions, purely as a matter of mouthfeel preference.
How to Make
- Spoon the cottage cheese into a bowl.
- Top with the fresh pineapple chunks, distributing them evenly or piling them in the center, depending on preference.
- If desired, add a sprinkle of fresh mint for brightness, a light dusting of cinnamon for warmth, or a scatter of chopped nuts for extra crunch and staying power.
- Serve immediately, chilled.
Why Is This a Pregnancy-Friendly, Fatigue-Fighting Snack?
Cottage cheese’s high protein content is the main reason this snack supports steady energy rather than a quick rise and fall. Protein takes longer to digest than carbohydrates alone, which means pairing it with pineapple’s natural sugars results in a more gradual release of energy than eating the fruit by itself would provide. This slower digestion also tends to support a longer feeling of fullness, which can help prevent the kind of energy dip that sometimes follows a purely carbohydrate-based snack.
Pineapple contributes more than just sweetness. It’s a good source of vitamin C, which supports immune function during a time when the body’s demands are elevated, and it contains an enzyme called bromelain, which some people find helpful for digestion, particularly after eating. Cottage cheese also brings B vitamins to the table, several of which play a direct role in how the body converts food into usable energy at the cellular level. Because this snack is light and cool rather than heavy, it also tends to be easier to enjoy even when appetite is reduced, which matters since skipping snacks altogether due to low appetite can itself contribute to fatigue over the course of a day.
Nutrition (per serving)
- Calories: ~180
- Carbohydrate: ~14g
- Fiber: ~1g
- Protein: ~24g
- Fat: ~3g
How to Store
This snack is easiest to enjoy fresh, but both components store well individually, making it simple to keep on hand for quick assembly throughout the week. Cottage cheese keeps in its original container in the refrigerator according to its use-by date, typically for about a week once opened, as long as it’s handled with a clean spoon each time to avoid introducing bacteria that speed spoilage. Fresh pineapple, once cut, should be stored in an airtight container in the refrigerator and is best used within 3–5 days for the best texture and flavor, since it can become slightly mushy and lose some of its bright taste the longer it sits. If you’re prepping for the week ahead, cutting a whole pineapple into chunks and portioning it into individual containers alongside single servings of cottage cheese means this snack can go from fridge to bowl in under a minute, which is often exactly what’s needed on a day when fatigue makes even simple tasks feel like more than you have energy for.